Private Cloud on a Raspberry Pi: Hardware
I don’t think I take privacy as seriously as people should. It is hard.
Where I live, banks ask you to send documents over WhatsApp. I don’t use WhatsApp. When I ask for an email address instead, bank employees often take a few seconds before responding.
But I also believe in taking baby steps.
For the last few years, I have been storing bits of my life on a Raspberry Pi instead of the Internet. Bits include contacts, to-do lists, passwords, photos and videos, and more.
Raspberry Pi

I am rather late in talking about Raspberry Pis. Most people already know what one is. And we have a lot more options now when it comes to single board computers (SBCs).
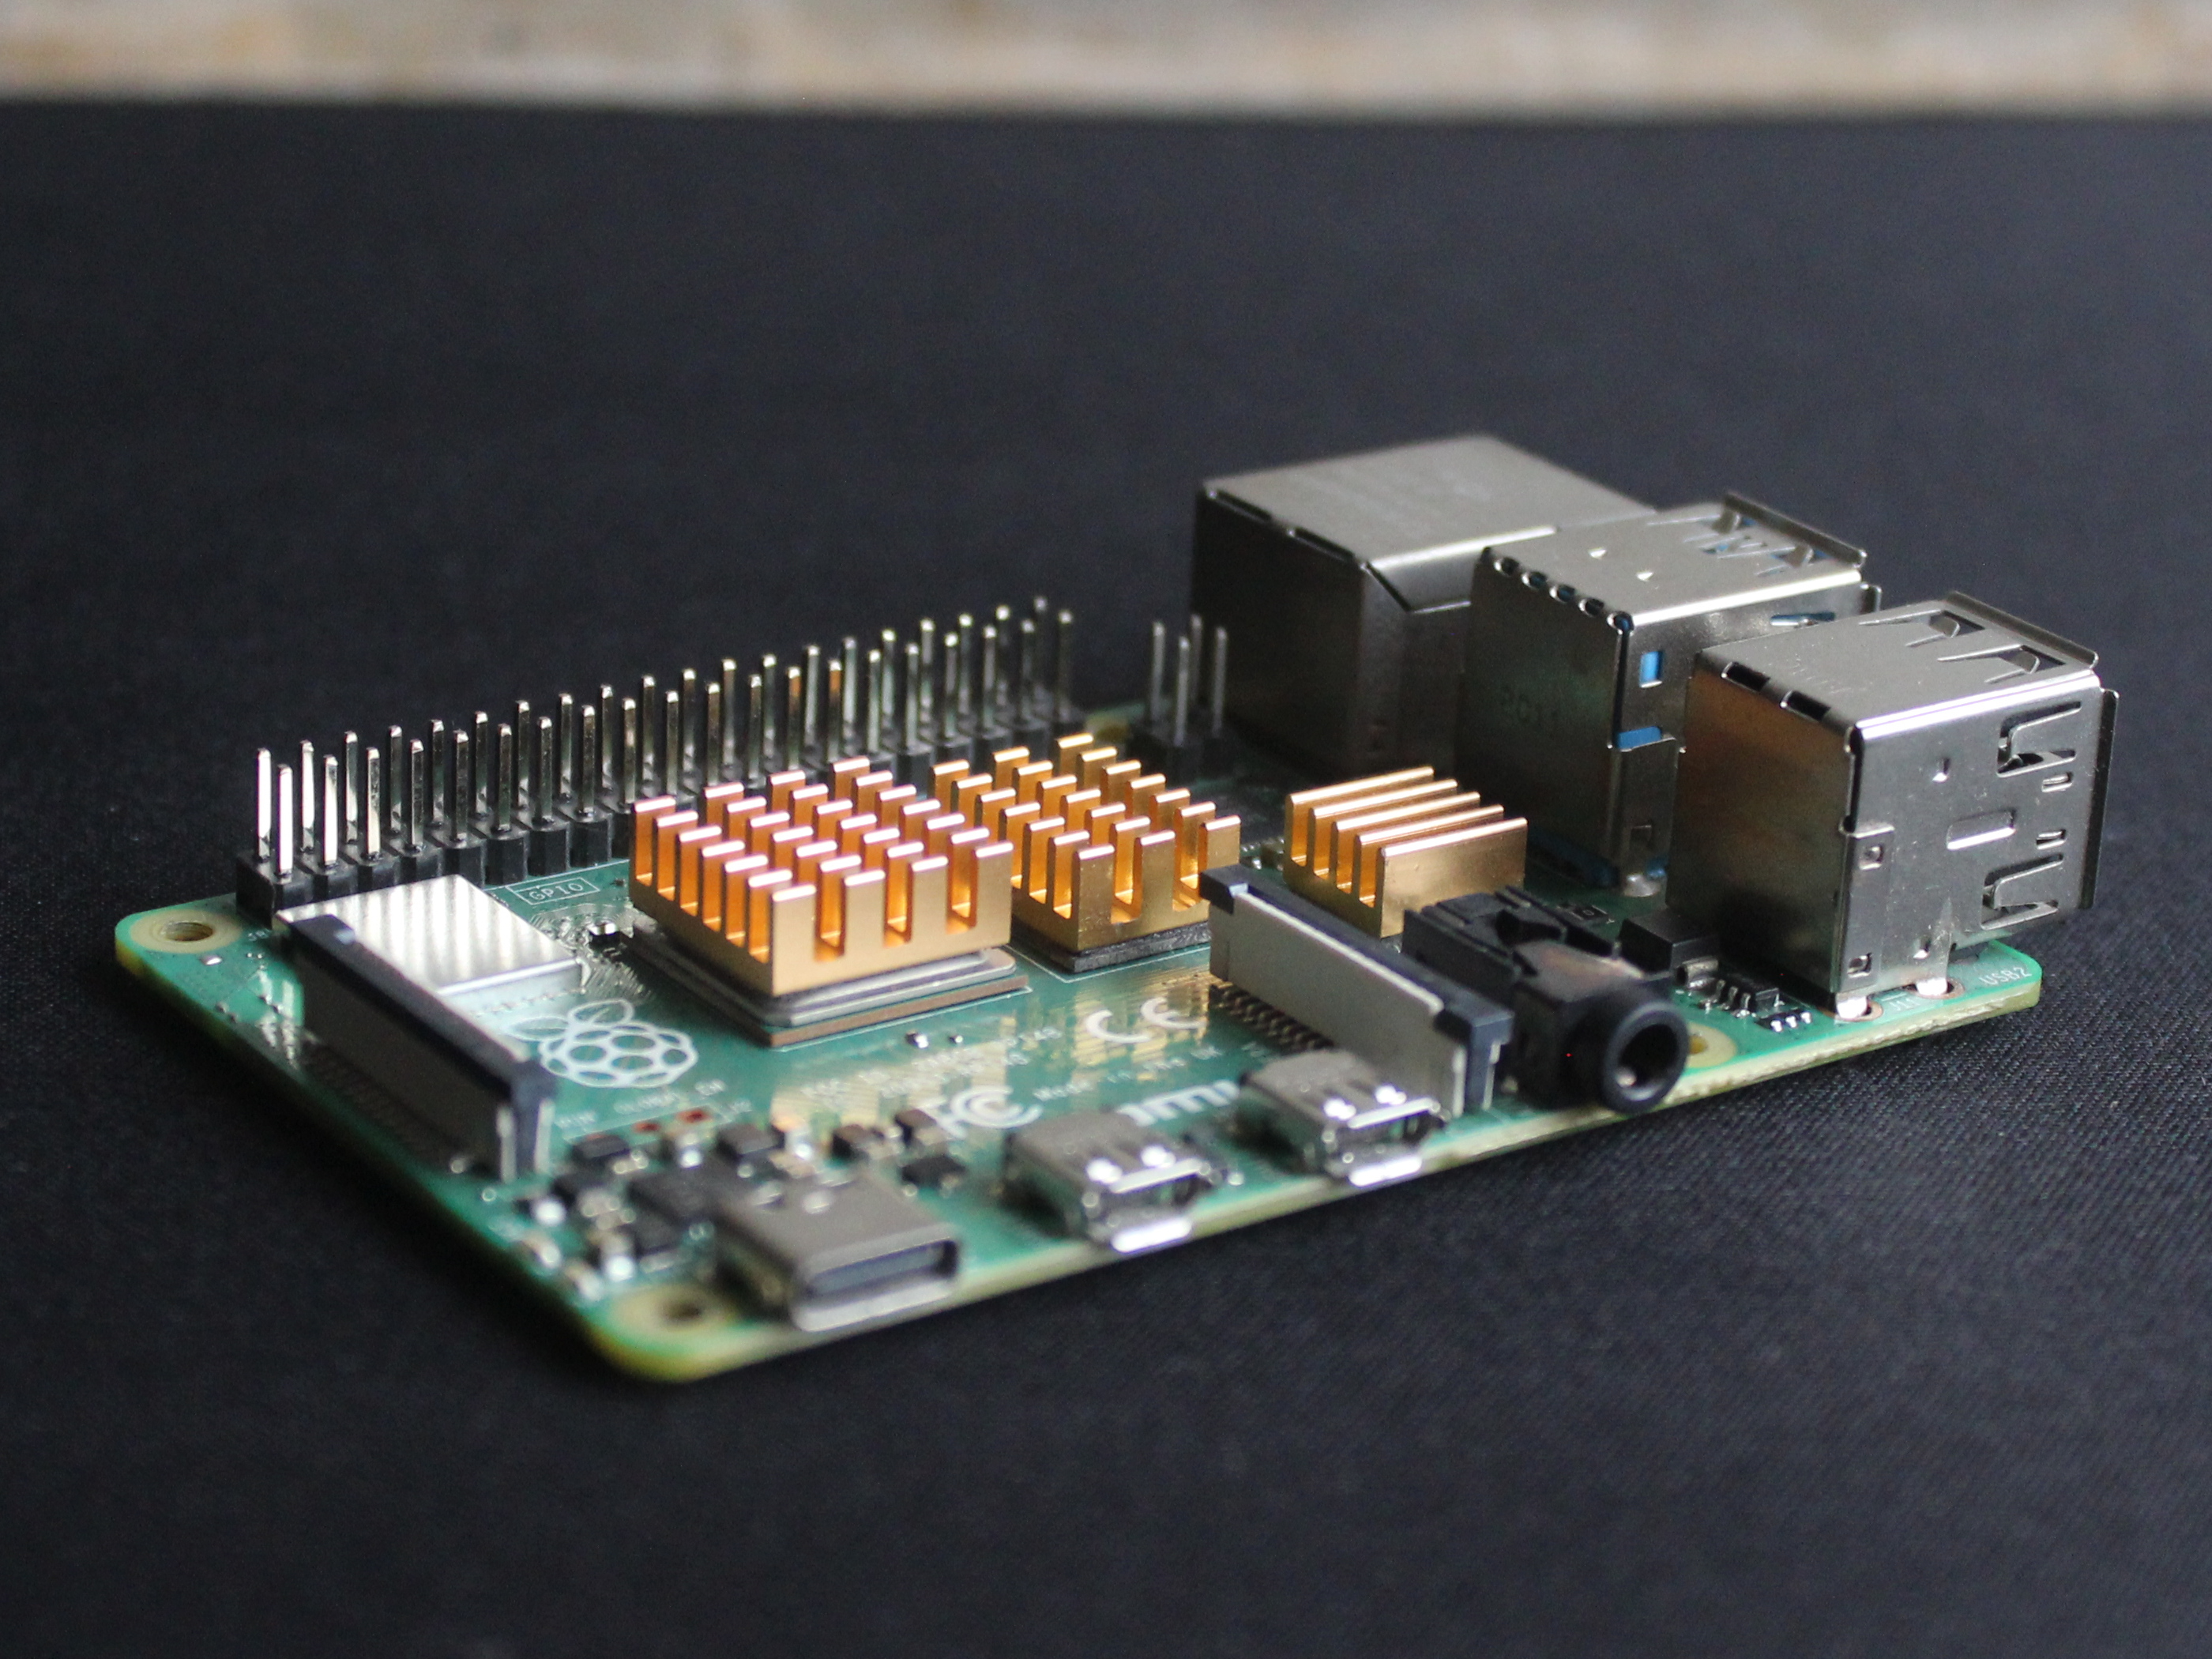
For my private cloud, I am using a Raspberry Pi 4 Model B.
Finding one has been pretty hard the last couple of years. But I hear you are more likely now to catch them in stock.
Hard Drives
A Raspberry Pi does not have those SATA or M.2 ports for connecting storage devices. The on-board way of adding storage is through an SD card. But SD cards aren’t exactly known to be reliable.
Since a Raspberry Pi has USB ports, you could connect portable hard drives. But then comes the issue of power delivery. You often have to use powered USB hubs to provide sufficient power for the Pi and the hard drives.
It would mean too many cables, something I wanted to avoid.
That is when I came across this expansion board by SupTronics Technologies: 2.5" SATA HDD Shield X883 V1.2.
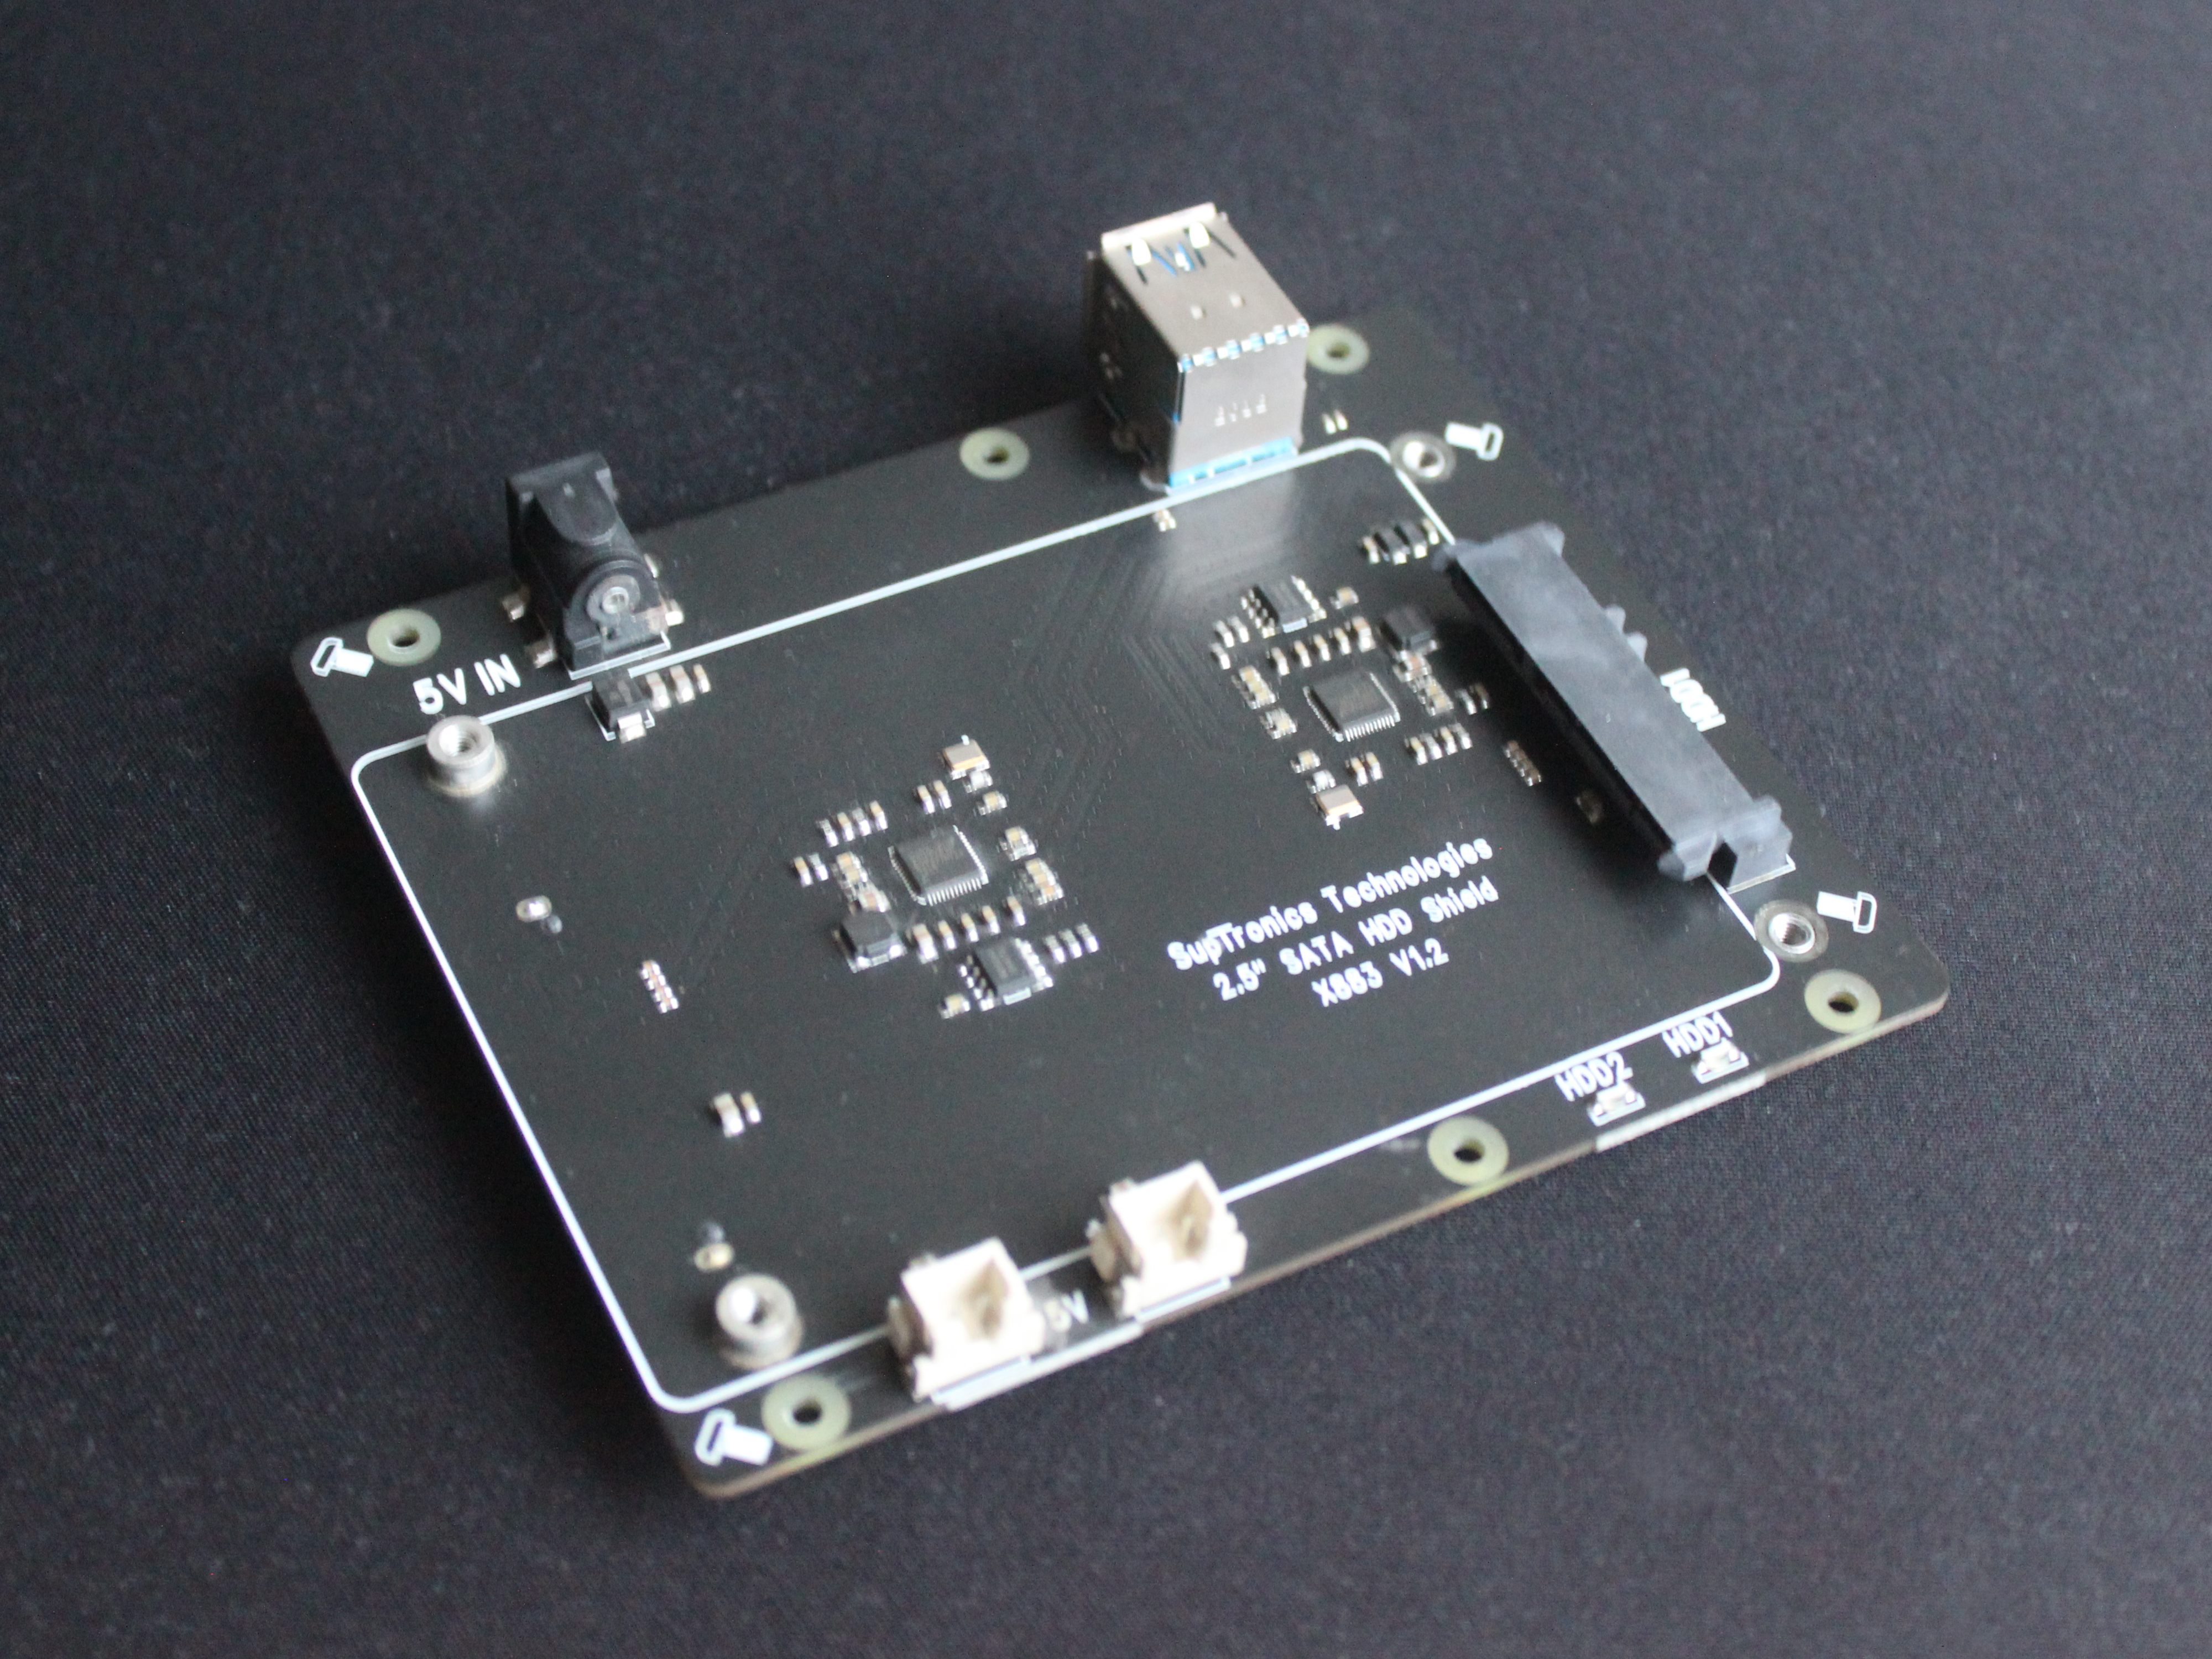
It takes two of the Pi’s USB 3.0 ports and allows you to connect two SATA hard drives. It also gives you this flat USB PCB to connect the Raspberry Pi and this board. It sits flush with the setup.
And best of all, the board has a socket for a barrel jack for 5V in. It can power the hard drives and the Raspberry Pi.
For hard drives I went for an SSD and a mechanical hard drive. I am using these two drives in RAID 1 (mirroring). By mixing the two types of hard drives, I wanted to get the benefits of both types.
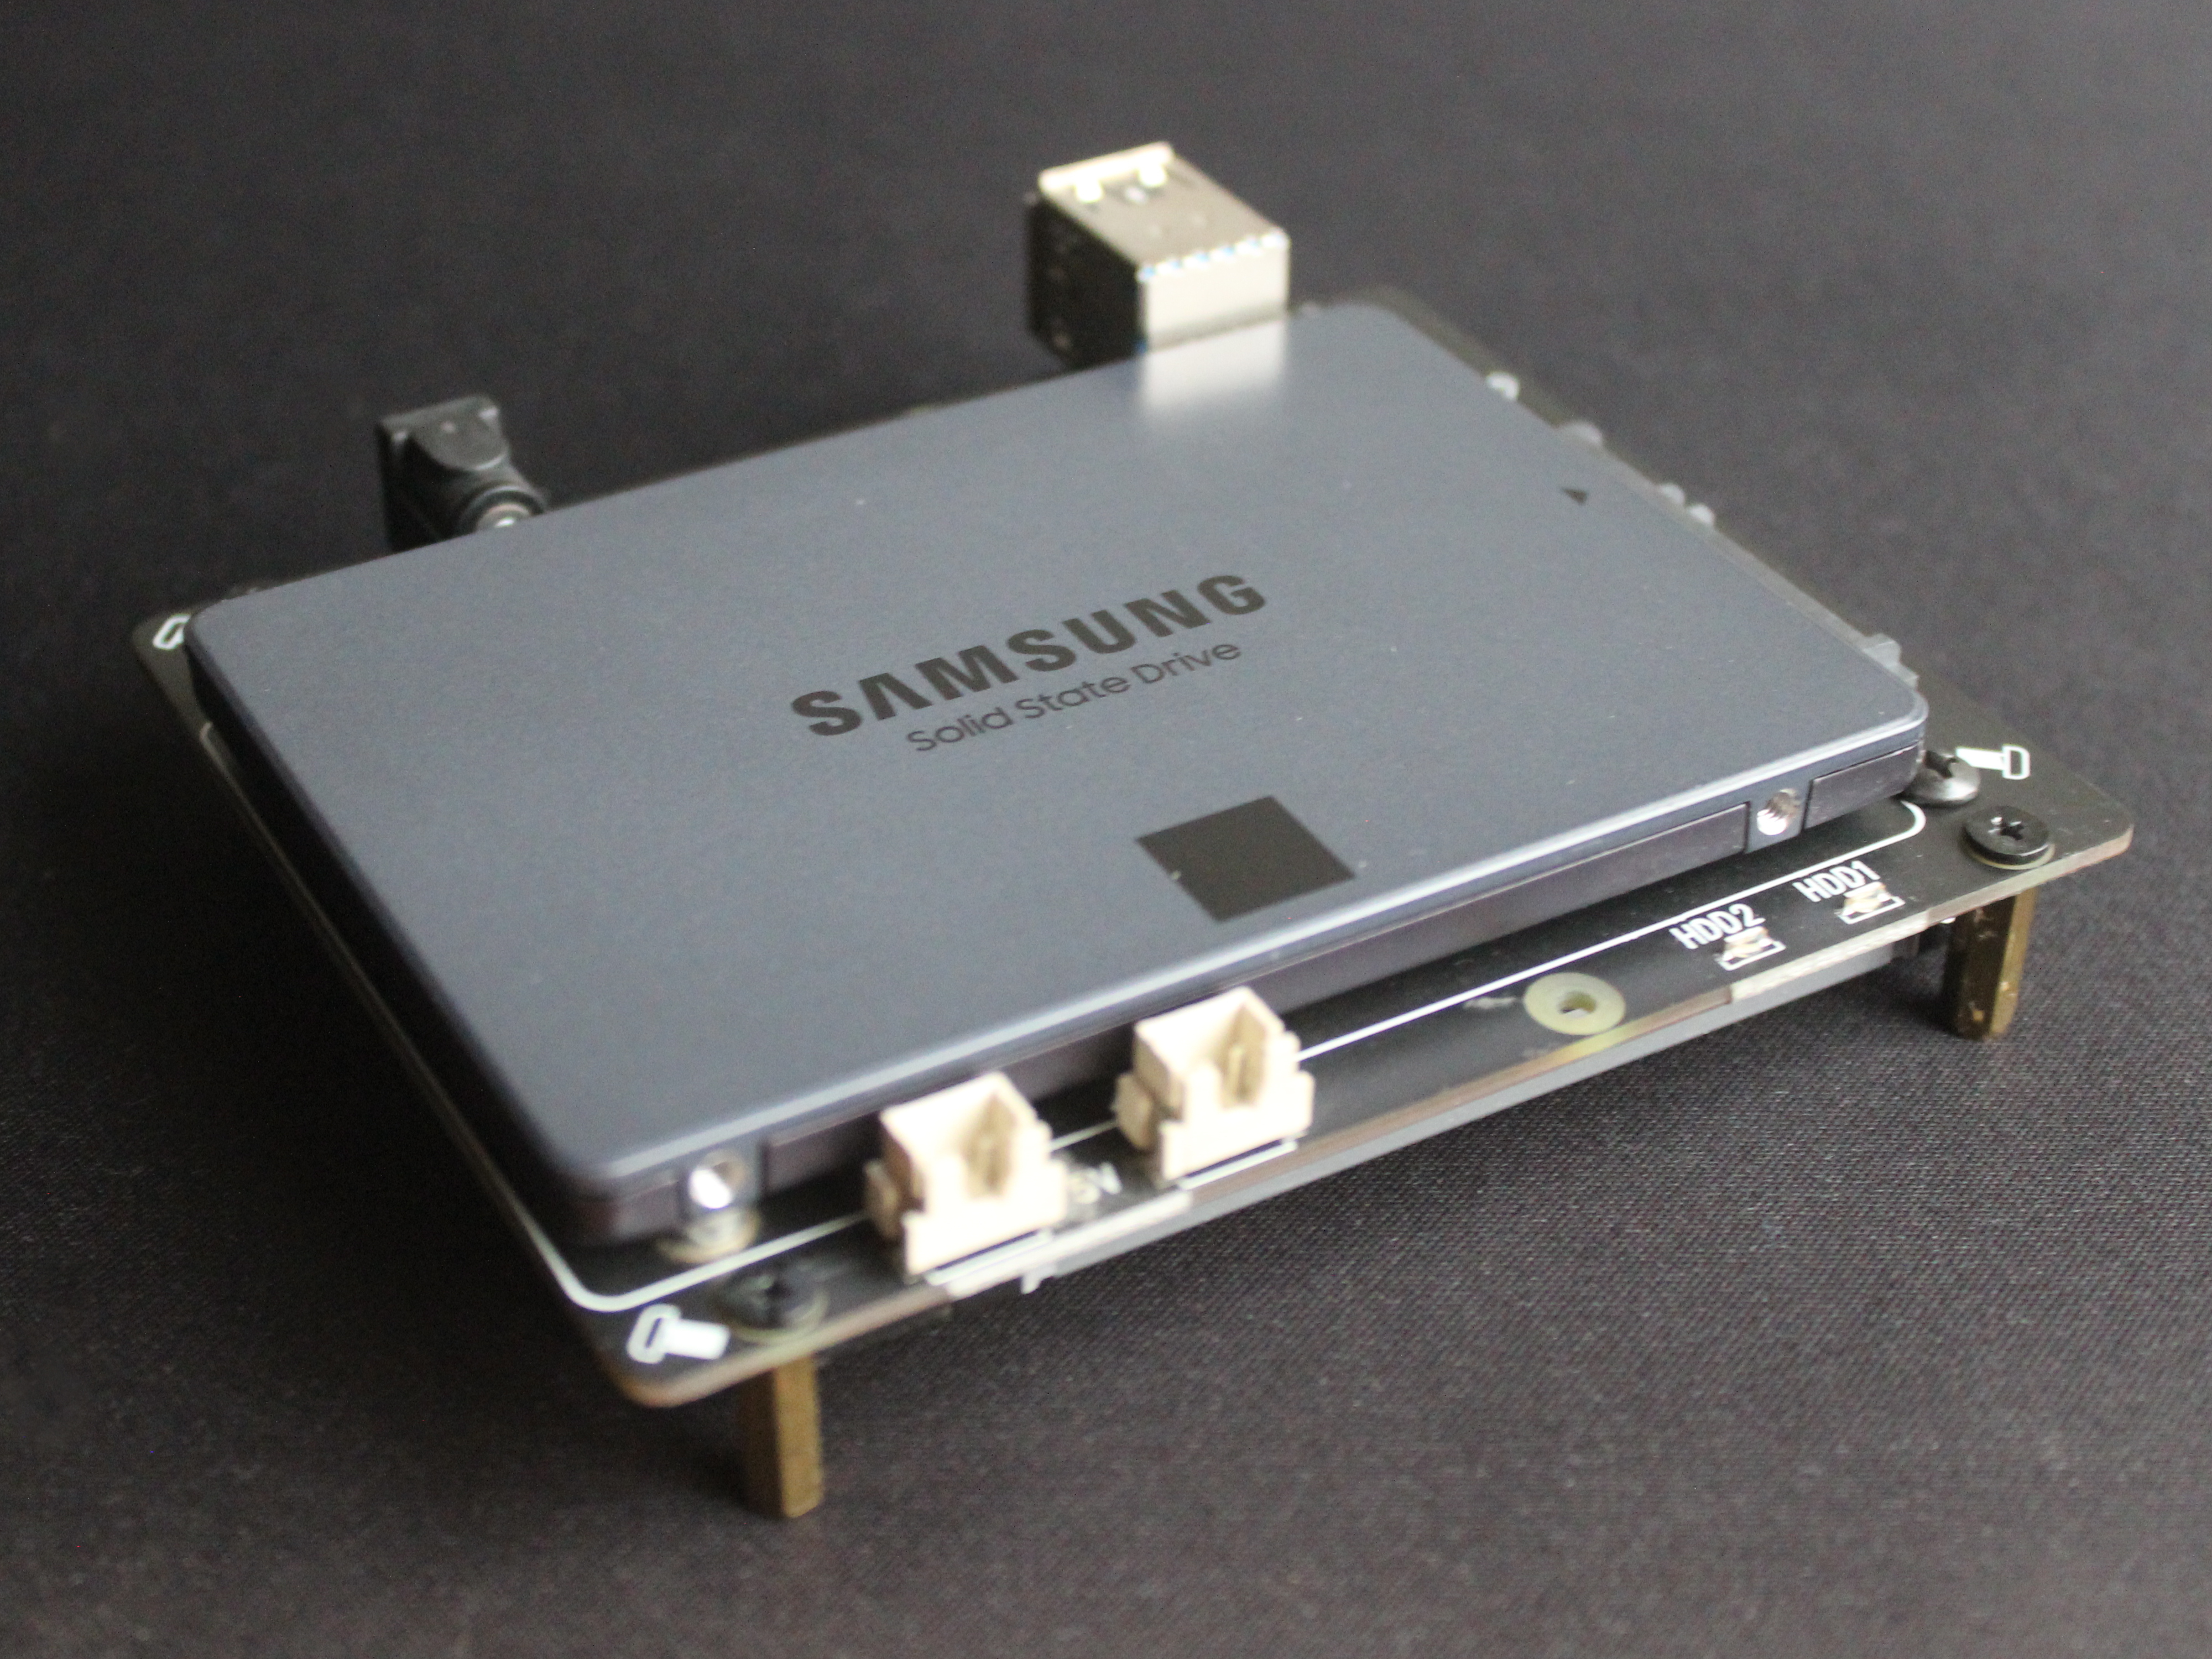
The other hard drive is connected below the PCB.
Power and Cooling
The same manufacturer makes another expansion board that provides a cooling fan for the Pi, takes care of power management, and provides an option for adding a power switch: Power Management Board X735 V2.5.
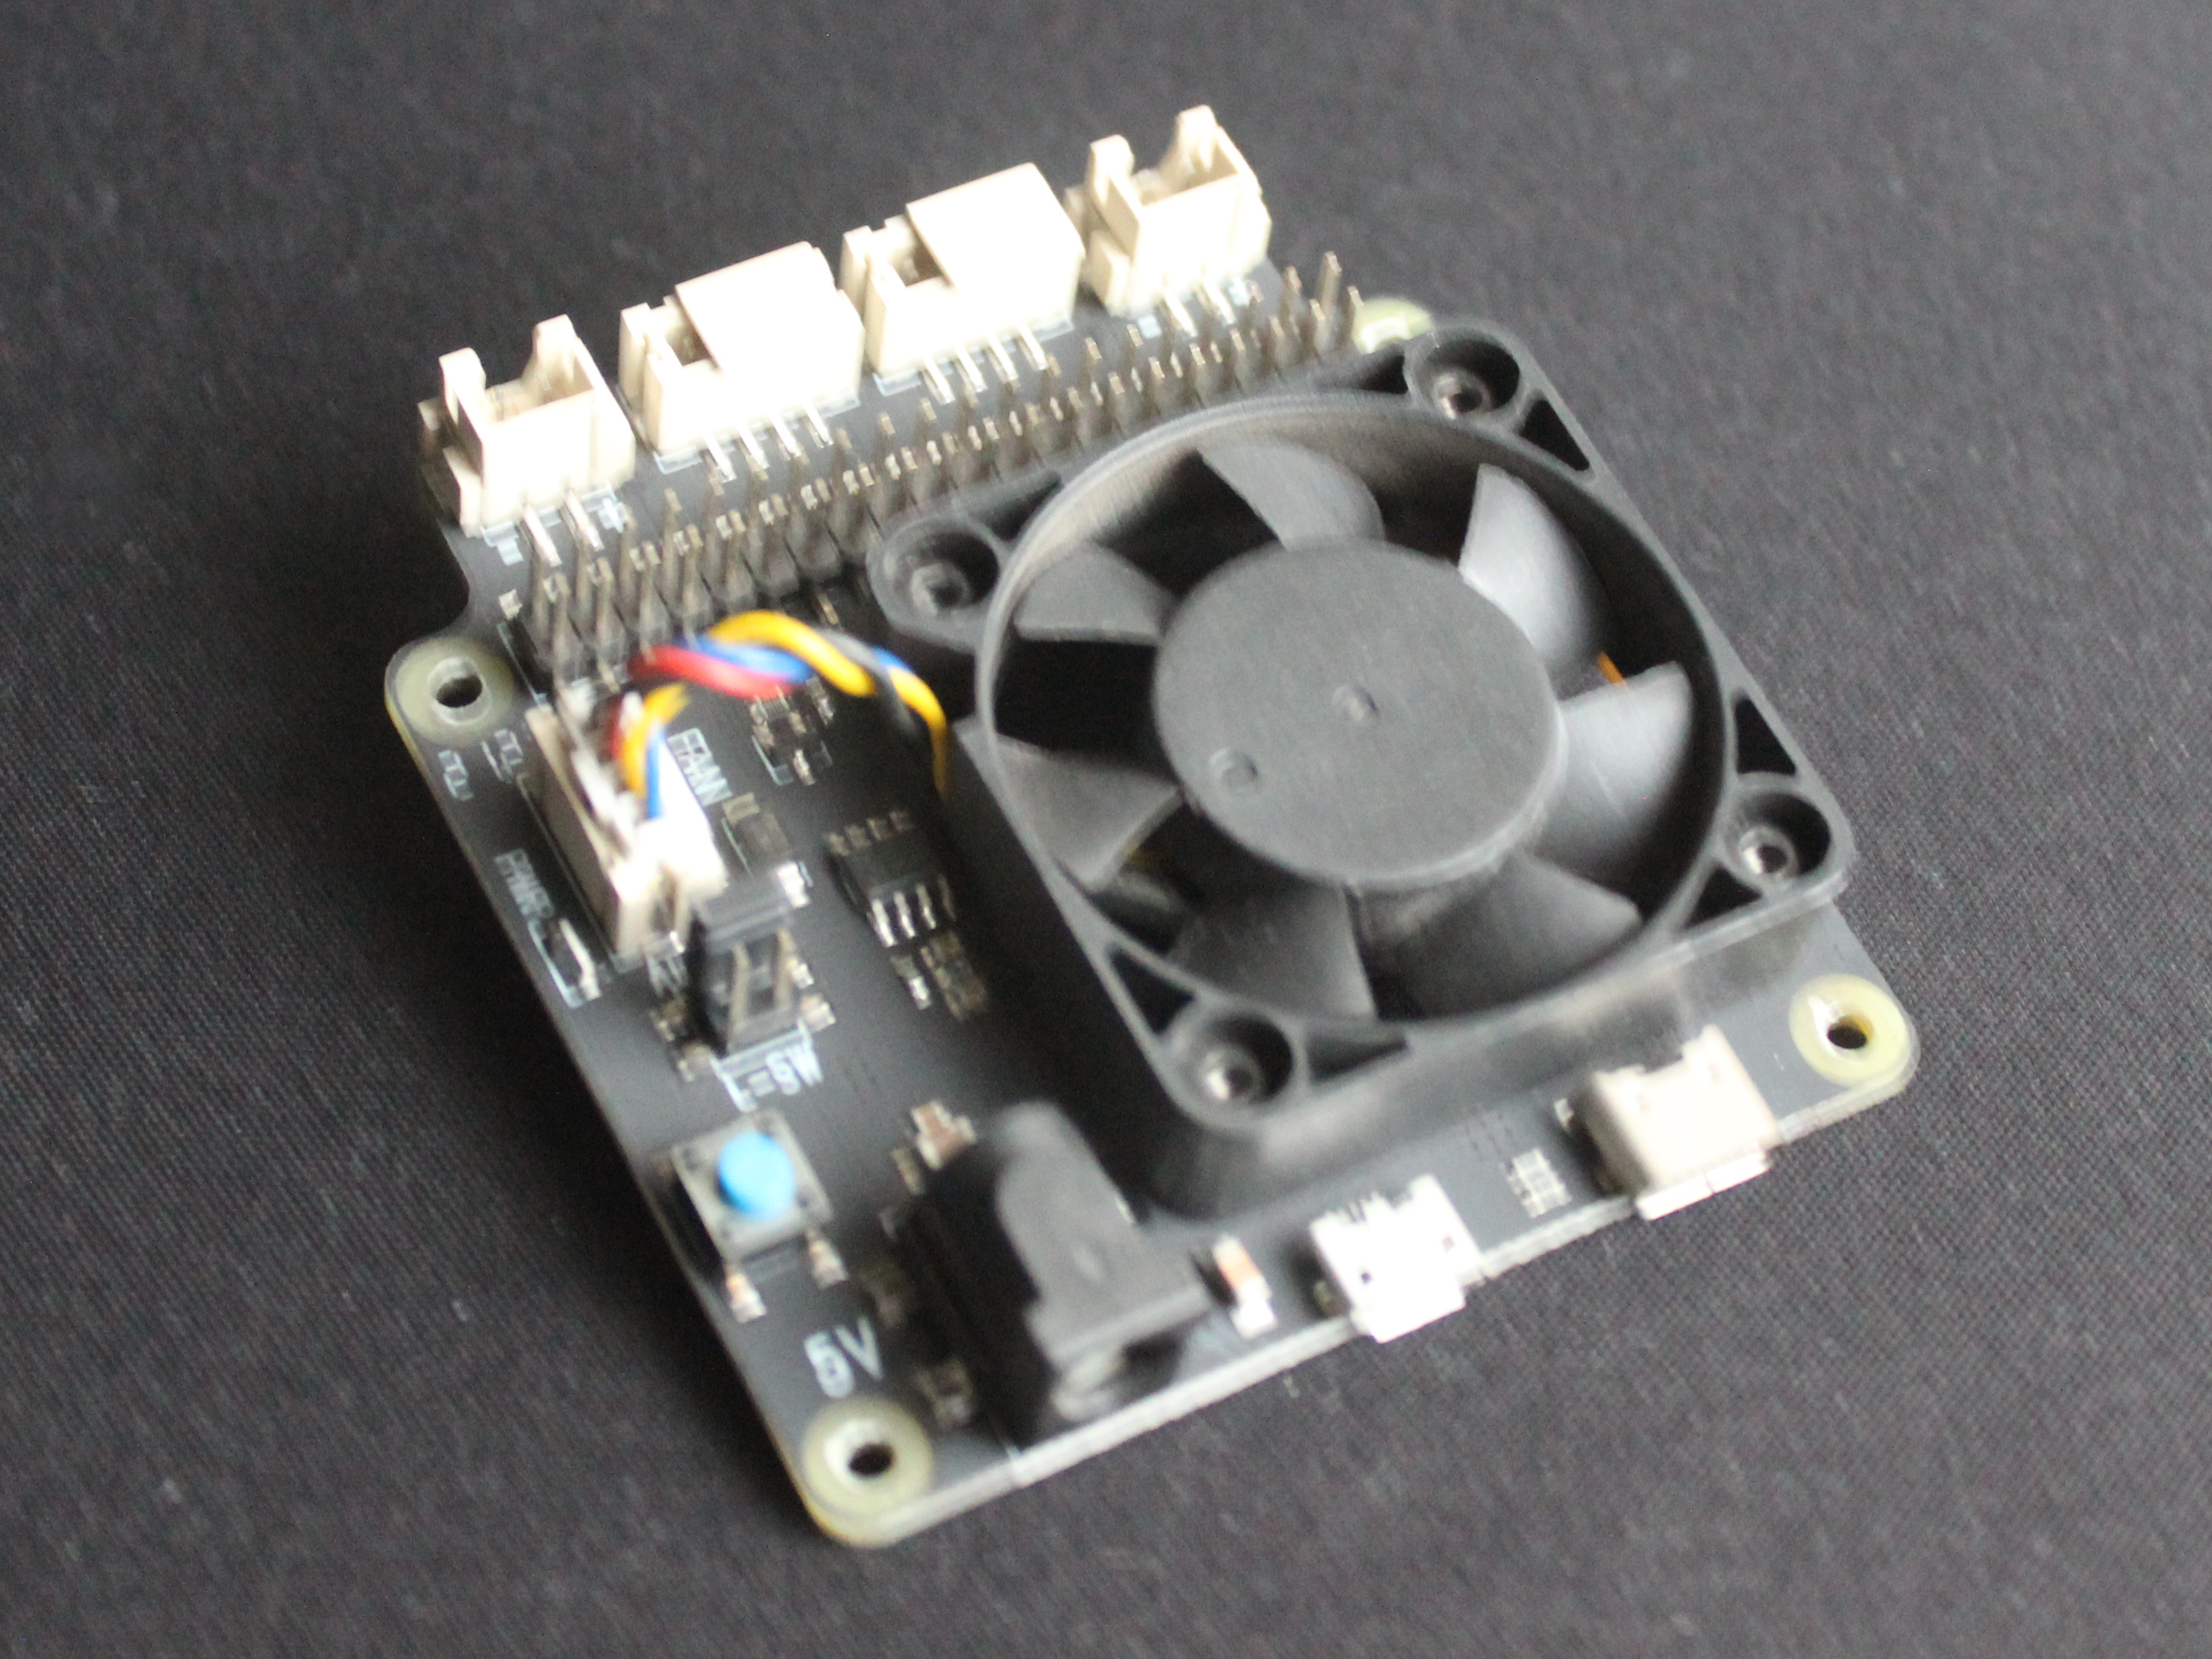
I was interested in the cooling fan here.
A 5V 4A power adapter connects to the barrel jack of the power management board at the top. That board can power the Raspberry Pi through the GPIO pins and the hard drive expansion board through a short cable.
With a jumper, you can configure the power management board to turn the Raspberry Pi on when there is power or the momentary switch is pressed.
Putting It Together
All the boards are held together with screws and spacers that come with the expansion boards.
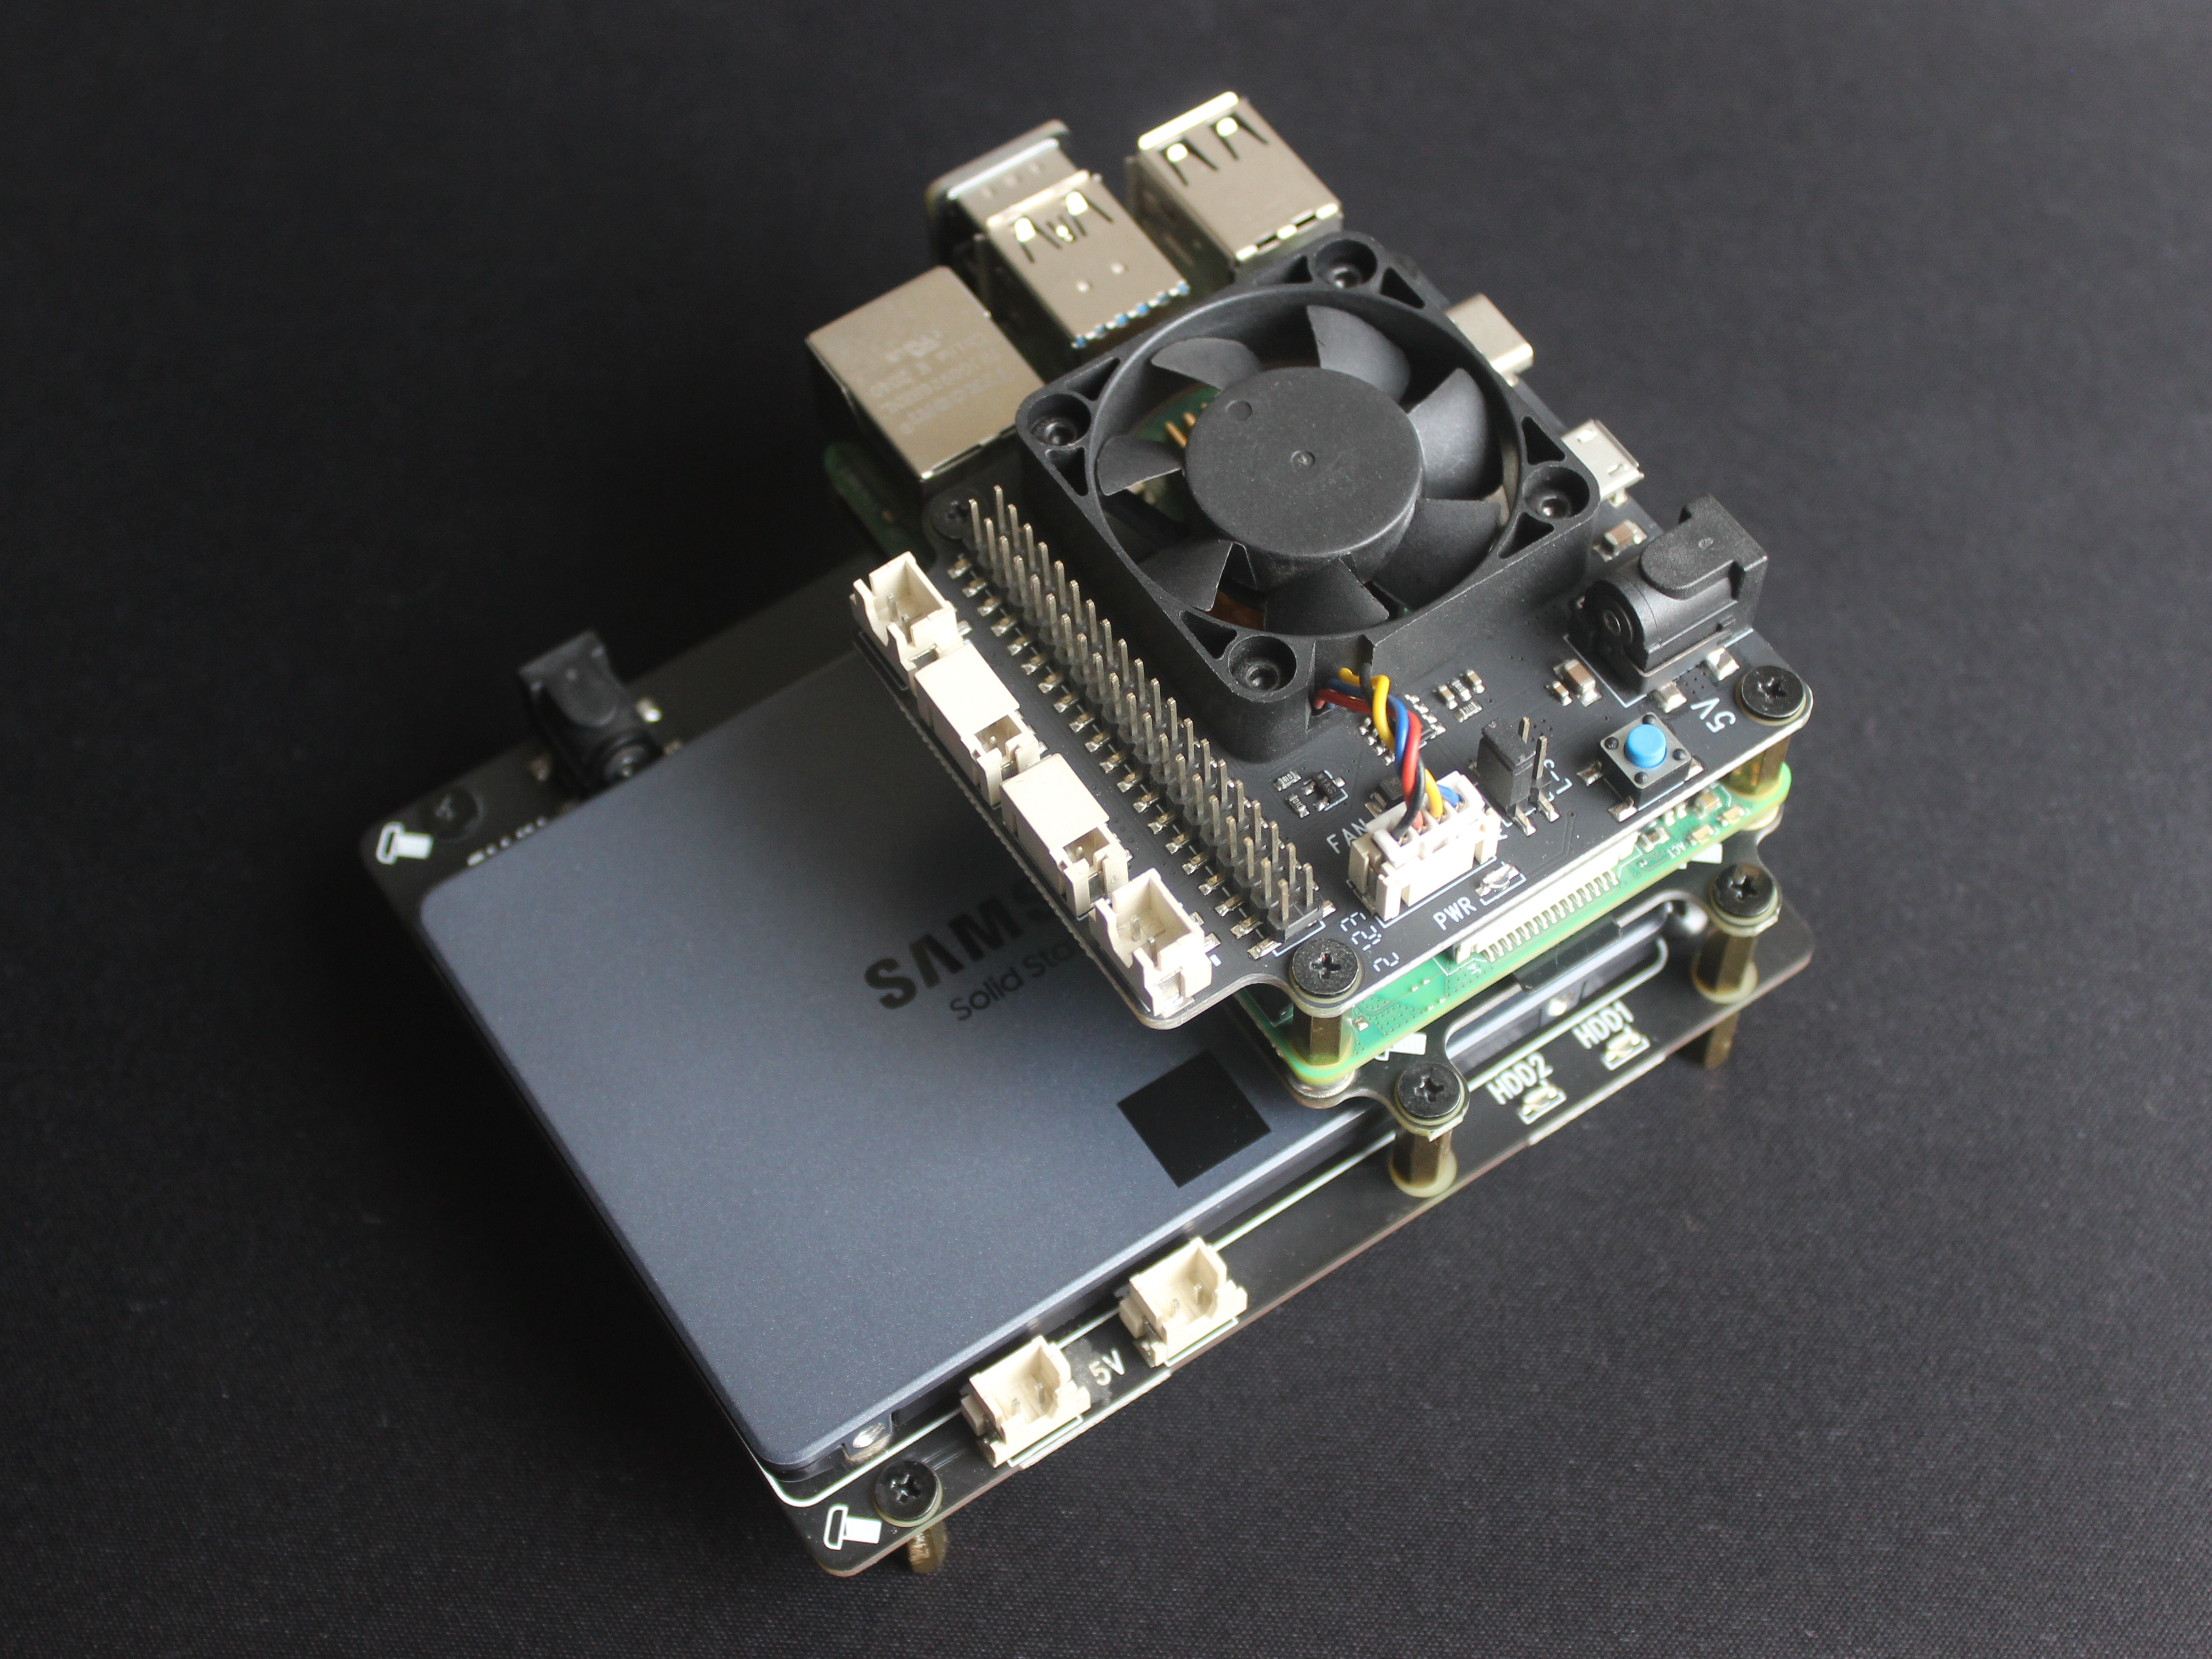
The Raspberry Pi goes on top of the hard drive expansion board. And the power management board goes above the Raspberry Pi.
Unfortunately, I couldn’t find a case that fits well with this setup. I suppose I have a real reason to use my benchy-printer.
Network and Internet
I connect this Raspberry Pi to my home network using ethernet. But I do not expose anything on this Pi over the Internet.
For that, I have a home VPN. When I connect to my home VPN, I can securely access all my private cloud services, even over the Internet.
What’s Next?
I will have to cover the operating system setup, how I got RAID 1 working, and the software on this Raspberry Pi through future blog posts.
I am also using a pair of relays with this Raspberry Pi to be able to turn my computer on or reset it remotely. But, again, that is a topic for a future blog post.
This post is 40th of my #100DaysToOffload challenge. Want to get involved? Find out more at 100daystooffload.com.
comments powered by Disqus