hjr265.me / blog /

Go Web Server for Remotely Powering on a Desktop Computer With a Raspberry Pi

Last month, I wrote a blog post on how to use a Raspberry Pi and a 5V 2-channel relay to remotely power on or reset a desktop computer.

Powering on a Desktop Computer Remotely With a Raspberry Pi

To keep the blog post simple, I used the gpio command to interact with the GPIO pins on the Raspberry Pi.

That works well. But by deploying a little web server you can have an easier user interface to power on or reset your desktop computer remotely.

To interact with the GPIO pins from Go, you can use the package go-rpio.

With this package, you can open the interface to the GPIO pins by calling rpio.Open. Then, use the rpio.Pin type to control individual pins.

For example, to pulse the pin that controls the power switch relay, you could do this:

 1
 2
 3
 4
 5
 6
 7
 8
 9
10
err := rpio.Open()
if err != nil {
  log.Fatal(err)
}

pin.Output() // Switch pin to output mode.

pin.Low()                          // Set the pin to low, activating the relay.
time.Sleep(250 * time.Millisecond) // Wait for 250ms.
pin.High()                         // Set the pin back to high.

The web server then needs four endpoints:

  • Simulate a power button press
  • Simulate a long power button press
  • Simulate a reset button press
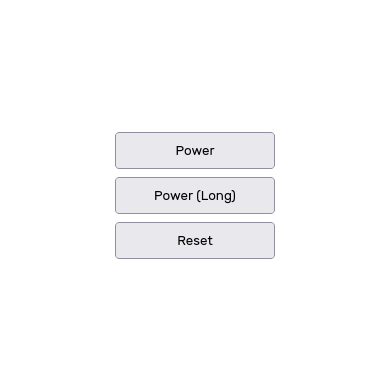
  • Serve the page with the three buttons

The page is essentially just 3 buttons wrapped in forms. Each of the three forms point to one of the three endpoints for triggering the relays through the GPIO pins.

 1
 2
 3
 4
 5
 6
 7
 8
 9
10
11
<!DOCTYPE html>
<html>
<head>
  <!-- ... -->
</head>
<body>
  <form method="POST" action="/power"><button type="submit">Power</button></form>
  <form method="POST" action="/power-long"><button type="submit">Power (Long)</button></form>
  <form method="POST" action="/reset"><button type="submit">Reset</button></form>
</body>
</html>

And the Go program:

 1
 2
 3
 4
 5
 6
 7
 8
 9
10
11
12
13
14
15
16
17
18
19
20
21
22
23
24
25
26
27
28
29
30
31
32
33
34
35
36
37
38
39
40
41
42
43
44
45
46
47
48
// Error handling omitted for brevity.

package main

import (
  "net/http"
  "time"

  "github.com/stianeikeland/go-rpio"
)

// relayHandler creates an http.Handler that activates the relay connected to
// pin p for duration d. The request is redirected back to the index page.
func relayHandler(p rpio.Pin, d time.Duration) http.Handler {
  return http.HandlerFunc(func(w http.ResponseWriter, r *http.Request) {
    p.Low()
    time.Sleep(d)
    p.High()
    http.Redirect(w, r, "/", http.StatusSeeOther)
  })
}

func serveIndex(w http.ResponseWriter, r *http.Request) {
  http.ServeFile(w, r, "index.html")
}

func main() {
  rpio.Open()

  // Prepare pins 27 and 22. These are the BCM pin numbers and correspond to
  // the GPIO pins 2 and 3.
  const (
    pinPower = rpio.Pin(27)
    pinReset = rpio.Pin(22)
  )
  for _, pin := range []rpio.Pin{pinPower, pinReset} {
    pin.High()
    pin.Output()
  }

  // Register handlers.
  http.Handle("/power", relayHandler(pinPower, 250*time.Millisecond))
  http.Handle("/power-long", relayHandler(pinPower, 5000*time.Millisecond))
  http.Handle("/reset", relayHandler(pinReset, 250*time.Millisecond))
  http.HandleFunc("/", serveIndex)

  http.ListenAndServe(":8080", nil)
}

And voila!

Screenshot of buttons to remotely power on a desktop computer

You now have a not-exactly fancy user interface to remotely power on your desktop computer with a Raspberry Pi.


This post is 95th of my #100DaysToOffload challenge. Want to get involved? Find out more at 100daystooffload.com.


comments powered by Disqus